How to Dye and Stain Baskets
Dyeing your Basket ...Before or After Weaving??
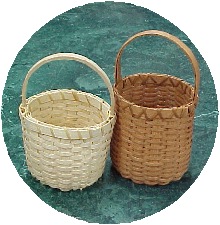
Another question of the week involved dyeing. Let's say that you're dyeing the entire basket one color. In that case, we would recommend waiting until the basket is finished- UNLESS it's a very large basket. You have to have a dye bath container large enough to contain the dye to COVER the basket. Example: Cape Cod Blueberry basket in a kitchen bucket. If the basket is large, dye all materials, including the handle, before you begin weaving.
Dyeing Small Amounts of Reed
If you want stripes of different colors, you'll dye the reed BEFORE weaving. Add 3 or 4 inches of hot water to a plastic tub and mix in half a packet of dye for a small amount. Dissolve well. Add a tablespoon of salt (the old quilter's color-set trick) and it will help to set the color on the reed, so that it doesn't bleed onto the other reed when you weave with it.
Add the reed and swish around to get it all wet. Let it soak about a half hour- maybe more- depending on the shade. Just remember that the dry, dyed reed will be much lighter than the wet, dyed reed.
Rinse the reed in cold running water until the water runs clear.
Always remember to dry the dyed reed completely before you RE-SOAK to weave with it.
Sometimes people wipe the reed with a cloth before they insert each strand. This is to prevent the dye from getting on your hands. I've never had that problem with our dyes.
Some very dark shades of grocery store dyes tend to bleed more.
Whichever brand of dye you use will have instructions on the packet.
Contents are copyright V I Reed & Cane Inc. If you are reading these entries from a location other than Basketweaving.com, that means that the source has stolen our copyrighted content.
|

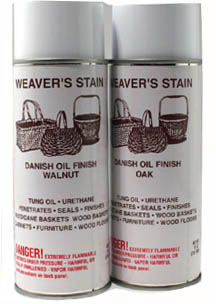

| Once your basket is completed and manicured, you are ready for the last step, which is staining. Print these tips: These tips will help you get the most baskets stained per can of Weaver's Stain. Always stain outside or in a well ventilated area. HOLD CAN APPROXIMATELY 10 INCHES FROM YOUR BASKET DO NOT spray the same area twice. You should be able to handle your basket after 15 minutes. However, let it dry 24 hours before actually using it. Any odor will dissipate after a few days. If you let your basket dry outside, in the shade, the odor will disappear sooner (during warm weather only). If it is damp or wet outside, it will take longer for your basket to dry. If possible bring your basket inside where it is warm and let it dry (place on a plain brown paper bag). You may wish to use a wire coat hanger when staining. Open up the hanger and hook your basket to one end and hang from a tree. This way you can walk around your basket when staining. We recommend that you take a large appliance box and cut the flaps out, set the box on its side and you have a stain booth. Eliminates any over-spray problem. Do not spray outside when it is below freezing, 32 degrees. The propellant breaks down in the cold and you are wasting your stain. You'll know when it is too cold, stain will come out in a stream. VERY IMPORTANT TIPS: When finished, turn your can upside down and press nozzle for 1 or 2 seconds. This will allow the propellant to clean the cylinder and nozzle. If the nozzle clogs, and it is a wide nozzle with a fat finger pad, you can remove this nozzle and soak it in mineral spirits for 15 minutes and rinse with water and place back on can. You're ready to stain again. |