Basket Weaving Handle Techniques
Handle Techniques- Wrapping and Twisted
Wrapping Materials
Flat reed, wide binding cane, chair cane, smoked reed, dyed reed, seagrass
Contents are copyright V I Reed & Cane Inc. If you are reading these entries
from a location other than Basketweaving.com, that means that the source has stolen our copyrighted content.
Wrapping Styles:
Wrapping a Rib Basket Handle, Wrapping a D Handle
Making a Twisted Round Reed Handle, Making a simple handle for a Kids Kit,
Making a Twisted Handle - Tray type.
BASIC: Lay one strand of a color (or smoked reed, as shown at left) on the top of the handle. Tuck the strand along the D handle, into the weaving- if a D handle has been used. Tuck a wrapping weaver (1/4" or narrower) into the weaving on the back of the D handle. Carry it around to the front and "wrap and weave" over and under the colored strand until you get to the other side.
Tuck the colored reed all the way into the body of the basket along the D handle.
Tuck the end of the wrapping reed into the weaving on the inside or outside of the basket.
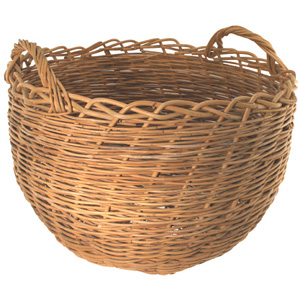
(a place where it'll be concealed fairly well) This is the handle wrap method that
we use on our Church Supper Basket. (above right)


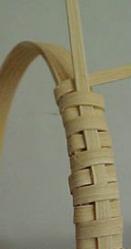
WOVEN: Cut two strands of medium cane (shown at left), or narrow reed, about 6 inches longer than the exposed part of the handle filler.
Tuck both strands side by side into the basket on one side of the handle filler, laying them on top of the filler.
Then tuck in a wrapping strand as was shown in the BASIC method. Take the wet wrapping strand and weave it over and under the two top strands and behind the oak filler. Bring it around and continue on plain weave: weave "over and under". When you get to the other side, tuck all ends securely.
At left here is a variation with Wide Binding Cane. At right: a variation with flat reed.
If you have a nice wide handle like this one,
you can insert three strands of reed and weave an impressive detailed handle. On this Hearth basket handle, I did the same technique described above.
Variation: You can also insert three strands of reed on the inside of the handle and weave the handle pattern on the outside and the inside.

You can weave a variation pattern of your own. Design your handle weaving with graph paper to try out designs. To weave, insert the reed as described above and follow your graph paper to make the pattern..
You can even use seagrass, like the baby seagrass, size #00, shown at right.
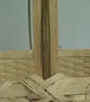
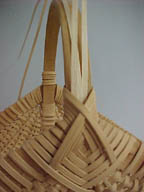
Making a Twisted Round Reed Handle
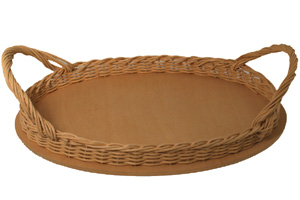
Example of a tray type twisted handle: I've cut two pieces of #3 round reed, making each one 80" long. I fold the two wet pieces over to make a ratio of about 3 to 4. Don't get it? Copy me. One side of the fold is about 36" long and the other is about 46". For fun, I've decided to make my example on a wicker box. Thread the two strands through the side of the box about an half inch from the top. Place it where you want the left side of the handle to be located.
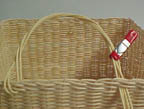
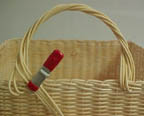
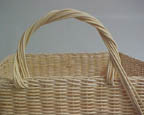
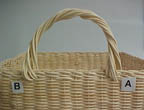
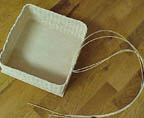
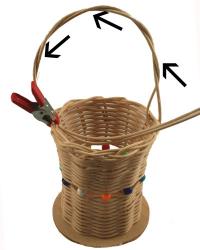
Photo 1 above: Holding the 4 strands of reed together, make 5 twists. Use a clamp to hold the twist in place.
Use your awl to open up the space where you want the other side of the twisted handle to connect.
Pull the 4 strands through from inside to out.
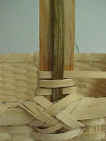
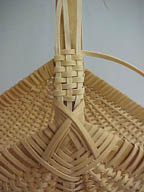
Photo 2 above: Remove clamp and twist the 4 strands back along the length of the reed
(which is now the beginning of a handle).
There are two ways to do this: wind WITH the direction of the previous twists for a smooth twist,
or wind OPPOSITE the previous reed twists for a criss-cross handle twist. The smooth twist is shown.
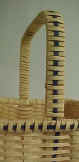
Photo 3 above: Now, bring the reed ends from outside of basket to the inside and twist back a THIRD time.
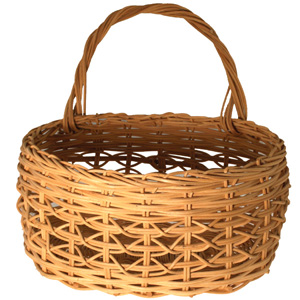
Three layers should be a substantial enough handle, but you can make your own judgment with your own basket projects. When you get to the other side of the handle, take each of the two SHORTEST strands, one at a time, and weave the ends into the basket at A. Then, carry the two longest strands back along the twist to finish on the left side at B. This will place the strand endings on both sides of the handle, instead of bunched up along one side. Repeat with another handle on the opposite side. If your handle is too lumpy, don't dwell on it- just cut it out, and do it again! You're saying: "easy for me to say!" But frankly, it's always best to do it over if it isn't right, or you'll never be satisfied with the basket. With practice, you'll be able to make these twisted handles as smooth as silk.
For a Kid's Kit twisted handle, go to our Kid's Kit Twisted Handle page.